Defining routes
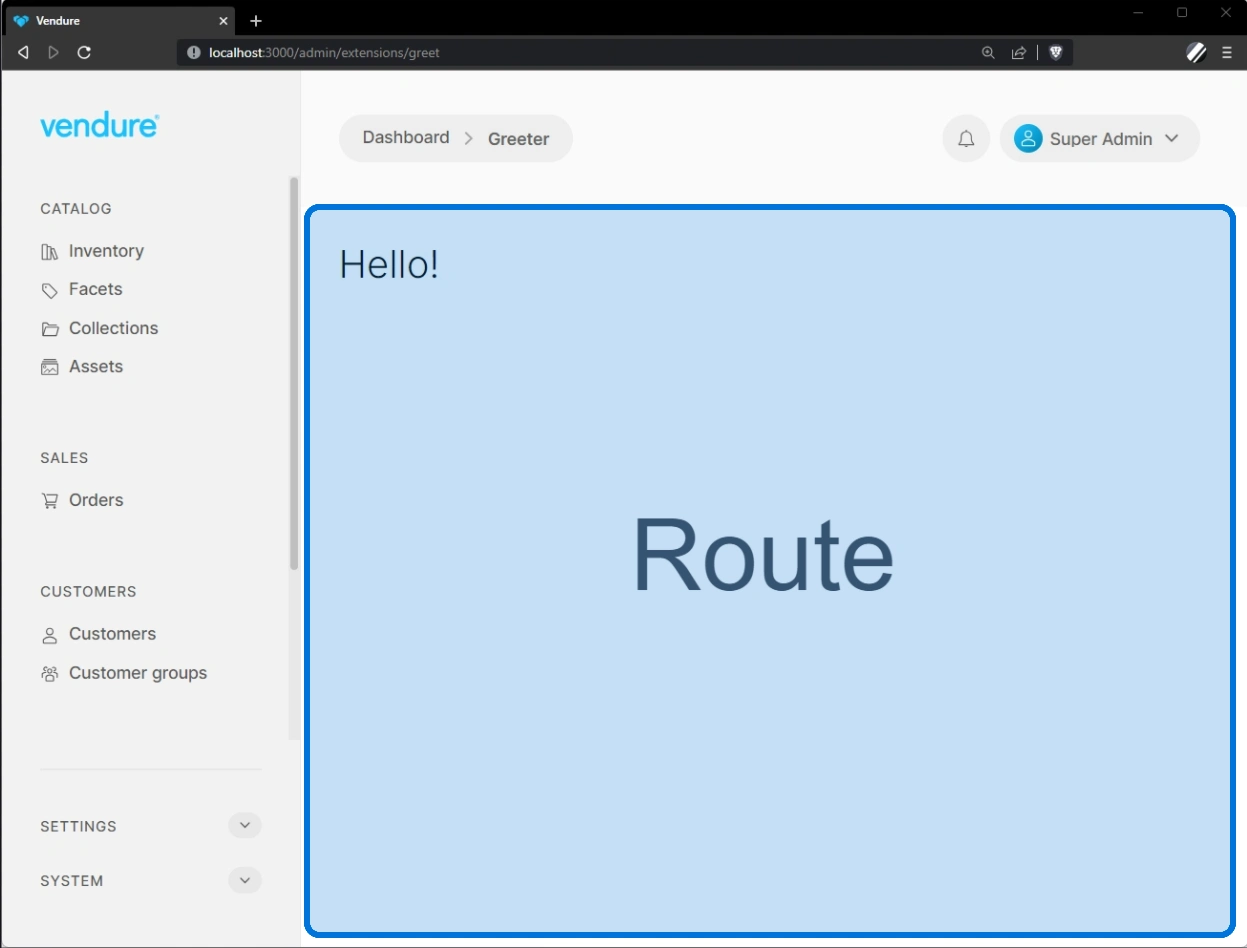
Routes allow you to mount entirely custom components at a given URL in the Admin UI. New routes will appear in this area of the Admin UI:
Routes can be defined natively using either Angular or React. It is also possible to use other frameworks in a more limited capacity.
Example: Creating a "Greeter" route
1. Create a plugin
We will first quickly scaffold a new plugin to house our UI extensions:
- Run
npx vendure addfrom your project root - Select
Create a new Vendure pluginand when prompted for a name, name it "greeter" - After the plugin is created, you will be prompted to add features to the plugin. Select
[Plugin: UI] Set up Admin UI extensions
You should now have a new plugin scaffolded at ./src/plugins/greeter, with some empty UI extension files in the ui
directory. If you check your vendure-config.ts file you should also see that your AdminUiPlugin.init() call has been modified
to compile the UI extensions:
AdminUiPlugin.init({
    route: 'admin',
    port: serverPort + 2,
    adminUiConfig: {
        apiPort: serverPort,
    },
    app: compileUiExtensions({
        outputPath: path.join(__dirname, '../admin-ui'),
        extensions: [
            GreeterPlugin.ui,
        ],
        devMode: true,
    }),
}),
2. Create the route component
First we need to create the component which will be mounted at the route. This component can be either an Angular component or a React component.
- Angular
- React
import { SharedModule } from '@vendure/admin-ui/core';
import { Component } from '@angular/core';

@Component({
    selector: 'greeter',
    template: `
        <vdr-page-block>
            <h2>{{ greeting }}</h2>
        </vdr-page-block>`,
    standalone: true,
    imports: [SharedModule],
})
export class GreeterComponent {
    greeting = 'Hello!';
}
import React from 'react';

export function Greeter() {
    const greeting = 'Hello!';
    return (
        <div className="page-block">
            <h2>{greeting}</h2>
        </div>
    );
}
The <vdr-page-block> (Angular) and <div className="page-block"> (React) is a wrapper that sets the layout and max width of your component to match the rest of the Admin UI. You should usually wrap your component in this element.
3. Define the route
Next we need to define a route in our routes.ts file. Note that this file can have any name, but "routes.ts" is a convention.
- Angular
- React
Using registerRouteComponent you can define a new route based on an Angular component.
import { registerRouteComponent } from '@vendure/admin-ui/core';
import { GreeterComponent } from './components/greeter/greeter.component';

export default [
    registerRouteComponent({
        component: GreeterComponent,
        path: '',
        title: 'Greeter Page',
        breadcrumb: 'Greeter',
    }),
];
Here's the equivalent example using React and registerReactRouteComponent:
import { registerReactRouteComponent } from '@vendure/admin-ui/react';
import { Greeter } from './components/Greeter';

export default [
    registerReactRouteComponent({
        component: Greeter,
        path: '',
        title: 'Greeter Page',
        breadcrumb: 'Greeter',
    }),
];
The path: '' is actually optional, since '' is the default value. But this is included here to show that you can mount different components at different paths. See the section on route parameters below.
4. Add the route to the extension config
Since you have used the CLI to scaffold your plugin, this part has already been done for you. But for the sake of completeness this is the part of your plugin which is configured to point to your routes file:
// ...
export class GreeterPlugin {
    static options: PluginInitOptions;

    static init(options: PluginInitOptions): Type<GreeterPlugin> {
        this.options = options;
        return GreeterPlugin;
    }

    static ui: AdminUiExtension = {
        id: 'greeter-ui',
        extensionPath: path.join(__dirname, 'ui'),
        routes: [{ route: 'greeter', filePath: 'routes.ts' }],
        providers: ['providers.ts'],
    };
}
Note that by specifying route: 'greeter', we are "mounting" the routes at the /extensions/greeter path.
The /extensions/ prefix is used to avoid conflicts with built-in routes. From Vendure v2.2.0 it is possible to customize
this prefix using the prefix property. See the section on overriding built-in routes for
more information.
The filePath property is relative to the directory specified in the extensionPath property. In this case, the routes.ts file is located at src/plugins/greeter/ui/routes.ts.
5. Test it out
Now run your app with npm run dev. Wait for it to compile the Admin UI extensions.
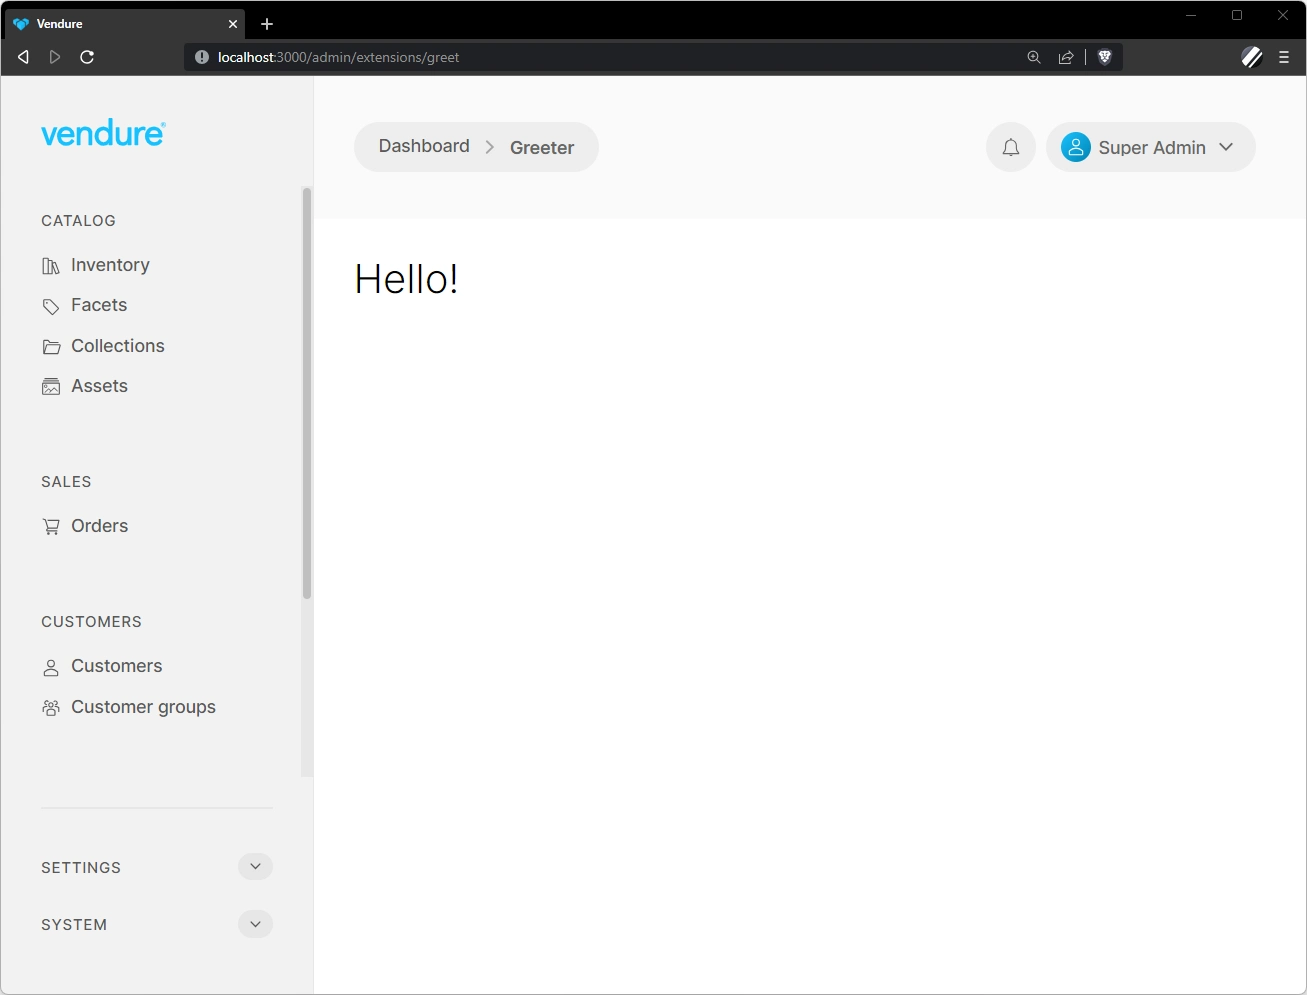
Now go to the Admin UI app in your browser and log in. You should now be able to manually enter the URL http://localhost:3000/admin/extensions/greeter and you should see the component with the "Hello!" header:
Links
To link to other routes, you must use the routerLink directive for Angular, or the Link component for React:
- Angular
- React
<a class="button-ghost" [routerLink]="['/extensions/my-plugin/my-custom-route']">
    John Smith
</a>
import React from 'react';
import { Link } from '@vendure/admin-ui/react';

export function DemoComponent() {
    return (
        <Link className="button-ghost" href="/extensions/my-plugin/my-custom-route">
            John Smith
        </Link>
    );
}
Route parameters
The path property is used to specify the path to a specific component. This path can contain parameters, which will then be made available to the component. Parameters are defined using the : prefix. For example:
- Angular
- React
import { registerRouteComponent } from '@vendure/admin-ui/core';
import { TestComponent } from './components/test/test.component';

export default [
    registerRouteComponent({
        component: TestComponent,
        path: ':id',
        title: 'Test',
        breadcrumb: 'Test',
    }),
];
import { registerReactRouteComponent } from '@vendure/admin-ui/react';
import { Test } from './components/Test';

export default [
    registerReactRouteComponent({
        component: Test,
        path: ':id',
        title: 'Test',
        breadcrumb: 'Test',
    }),
];
The id parameter will then be available in the component:
- Angular
- React
import { SharedModule } from '@vendure/admin-ui/core';
import { Component } from '@angular/core';
import { ActivatedRoute } from '@angular/router';

@Component({
    selector: 'test',
    template: `
        <vdr-page-block>
            <p>id: {{ id }}</p>
        </vdr-page-block>`,
    standalone: true,
    imports: [SharedModule],
})
export class TestComponent {
    id: string;

    constructor(private route: ActivatedRoute) {
        this.id = this.route.snapshot.paramMap.get('id');
    }
}
import React from 'react';
import { useRouteParams } from '@vendure/admin-ui/react';

export function Test() {
    const { params } = useRouteParams();
    return (
        <div className="page-block">
            <p>id: {params.id}</p>
        </div>
    );
}
Loading the route /extensions/test/123 will then display the id "123".
Injecting services
It is possible to inject services into your components. This includes both the built-in services for things like data fetching, notifications and modals, as well as any custom services you have defined in your UI extension.
Here's an example of injecting the built-in NotificationService into a component to display a toast notification:
- Angular
- React
In Angular, we can use either the constructor to inject the service (as shown below), or the inject() function. See the Angular dependency injection guide for more information.
import { SharedModule, NotificationService } from '@vendure/admin-ui/core';
import { Component } from '@angular/core';

@Component({
    selector: 'test',
    template: `
        <vdr-page-block>
            <button class="button primary" (click)="showNotification()">Click me</button>
        </vdr-page-block>`,
    standalone: true,
    imports: [SharedModule],
})
export class TestComponent {
    constructor(private notificationService: NotificationService) {}

    showNotification() {
        this.notificationService.success('Hello!');
    }
}
In React, we use the useInjector() hook to inject the service:
import { NotificationService } from '@vendure/admin-ui/core';
import { useInjector } from '@vendure/admin-ui/react';
import React from 'react';

export function Test() {
    const notificationService = useInjector(NotificationService);

    function showNotification() {
        notificationService.success('Hello!');
    }
    return (
        <div className="page-block">
            <button className="button primary" onClick={showNotification}>Click me</button>
        </div>
    );
}
Setting page title
The title property is used to set the page title. This is displayed in the browser tab as well as in the page header.
In the route definition
The page title can be set in the route definition:
- Angular
- React
import { registerRouteComponent } from '@vendure/admin-ui/core';
import { TestComponent } from './components/test/test.component';

export default [
    registerRouteComponent({
        component: TestComponent,
        title: 'Test',
        breadcrumb: 'Test',
    }),
];
import { registerReactRouteComponent } from '@vendure/admin-ui/react';
import { Test } from './components/Test';

export default [
    registerReactRouteComponent({
        component: Test,
        title: 'Test',
        breadcrumb: 'Test',
    }),
];
Dynamically from the component
It is also possible to update the page title dynamically from the route component itself:
- Angular
- React
import { PageMetadataService, SharedModule } from '@vendure/admin-ui/core';
import { Component } from '@angular/core';

@Component({
    selector: 'test',
    template: `
        <vdr-page-block>
            <vdr-card>
                <button class="button primary" (click)="handleClick()">Update title</button>
            </vdr-card>
        </vdr-page-block>`,
    standalone: true,
    imports: [SharedModule],
})
export class TestComponent {
    constructor(private pageMetadataService: PageMetadataService) {}

    handleClick() {
        pageMetadataService.setTitle('New title');
    }
}
import { Card, usePageMetadata } from '@vendure/admin-ui/react';
import React from 'react';

export function Test() {
    const { setTitle } = usePageMetadata();

    function handleClick() {
        setTitle('New title');
    }
    return (
        <div className="page-block">
            <Card>
                <button className="button primary" onClick={handleClick}>
                    Update title
                </button>
            </Card>
        </div>
    );
}
Setting breadcrumbs
In the route definition
The page breadcumbs can be set in the route definition in a couple of ways. The simplest is to specify the breadcumb property:
- Angular
- React
import { registerRouteComponent } from '@vendure/admin-ui/core';
import { TestComponent } from './components/test/test.component';

export default [
    registerRouteComponent({
        component: TestComponent,
        title: 'Test',
        locationId: 'my-location-id'
        breadcrumb: 'Test',
    }),
];
import { registerReactRouteComponent } from '@vendure/admin-ui/react';
import { Test } from './components/Test';

export default [
    registerReactRouteComponent({
        component: Test,
        title: 'Test',
        breadcrumb: 'Test',
    }),
];
This can be a string (as above), a link/label pair, or an array of link/label pairs:
import { registerRouteComponent } from '@vendure/admin-ui/core';
import { TestComponent } from './components/test/test.component';

export default [
    registerRouteComponent({
        component: TestComponent,
        path: 'test-1',
        title: 'Test 1',
        breadcrumb: { label: 'Test', link: '/extensions/test' },
    }),
    registerRouteComponent({
        component: TestComponent,
        path: 'test-2',
        title: 'Test 2',
        breadcrumb: [
            { label: 'Parent', link: '/extensions/test' },
            { label: 'Child', link: '/extensions/test/test-2' },
        ],
    }),
];
A more powerful way to set the breadcrumbs is by using the getBreadcrumbs property. This is a function that receives any resolved detail data and returns an array of link/label pairs. An example of its use can be seen in the Creating detail views guide.
Dynamically from the component
Similar to setting the title, the breadcrumbs can also be updated dynamically from the route component itself:
- Angular
- React
import { PageMetadataService, SharedModule } from '@vendure/admin-ui/core';
import { Component } from '@angular/core';

@Component({
    selector: 'test',
    template: `
        <vdr-page-block>
            <vdr-card>
                <button class="button primary" (click)="handleClick()">Update breadcrumb</button>
            </vdr-card>
        </vdr-page-block>`,
    standalone: true,
    imports: [SharedModule],
})
export class TestComponent {
    constructor(private pageMetadataService: PageMetadataService) {}

    handleClick() {
        pageMetadataService.setBreadcrumb('New breadcrumb');
    }
}
import { Card, usePageMetadata } from '@vendure/admin-ui/react';
import React from 'react';

export function Test() {
    const { setBreadcrumb } = usePageMetadata();

    function handleClick() {
        setBreadcrumb('New breadcrumb');
    }
    return (
        <div className="page-block">
            <Card>
                <button className="button primary" onClick={handleClick}>
                    Update title
                </button>
            </Card>
        </div>
    );
}
Overriding built-in routes
From Vendure v2.2.0, it is possible to override any of the built-in Admin UI routes. This is useful if you want to completely replace a built-in route with your own custom component.
To do so, you'll need to specify the route prefix to be '', and then specify a route property which matches
a built-in route.
For example, let's say we want to override the product detail page. The full path of that route is:
/catalog/products/:id
import { VendureConfig } from '@vendure/core';
import { AdminUiPlugin } from '@vendure/admin-ui-plugin';
import { compileUiExtensions } from '@vendure/ui-devkit/compiler';
import * as path from 'path';

export const config: VendureConfig = {
    // ...
    plugins: [
        AdminUiPlugin.init({
            port: 3002,
            app: compileUiExtensions({
                outputPath: path.join(__dirname, '../admin-ui'),
                extensions: [
                    {
                        id: 'my-plugin',
                        extensionPath: path.join(__dirname, 'plugins/my-plugin/ui'),
                        routes: [
                            {
                                // Setting the prefix to '' means that we won't add the
                                // default `/extensions/` prefix to the route
                                prefix: '',
                                // This part matches the built-in route path for the
                                // "catalog" module
                                route: 'catalog',
                                filePath: 'routes.ts',
                            },
                        ],
                    },
                ],
            }),
        }),
    ],
};
Then in the routes.ts file, you can define a route which matches the built-in route:
- Angular
- React
import { GetProductDetailDocument, registerRouteComponent } from '@vendure/admin-ui/core';
import { MyProductDetailComponent } from './components/product-detail/product-detail.component';

export default [
    registerRouteComponent({
        component: MyProductDetailComponent,
        // The path must then match the remainder
        // of the built-in route path
        path: 'products/:id',
        // We can re-use the GraphQL query from the core to get
        // access to the same data in our component
        query: GetProductDetailDocument,
        entityKey: 'product',
        getBreadcrumbs: entity => [
            { label: 'breadcrumb.products', link: ['/catalog/products'] },
            { label: entity?.name ?? 'catalog.create-new-product', link: ['.'] },
        ],
    }),
];
import { GetProductDetailDocument } from '@vendure/admin-ui/core';
import { registerReactRouteComponent } from '@vendure/admin-ui/react';
import { MyProductDetail } from './components/ProductDetail';

export default [
    registerReactRouteComponent({
        component: MyProductDetail,
        // The path must then match the remainder
        // of the built-in route path
        path: 'products/:id',
        // We can re-use the GraphQL query from the core to get
        // access to the same data in our component
        query: GetProductDetailDocument,
        entityKey: 'product',
        getBreadcrumbs: entity => [
            { label: 'breadcrumb.products', link: ['/catalog/products'] },
            { label: entity?.name ?? 'catalog.create-new-product', link: ['.'] },
        ],
    }),
];
Advanced configuration
The Admin UI app routing is built on top of the Angular router - a very advanced and robust router. As such, you are able to tap into all the advanced features it provides by using the routeConfig property, which takes an Angular Route definition object and passes it directly to the router.
import { registerRouteComponent } from '@vendure/admin-ui/core';
import { inject } from '@angular/core';
import { ActivatedRouteSnapshot } from '@angular/router';
import { TestComponent } from './components/test/test.component';
import { PermissionsService } from './services';

export default [
    registerRouteComponent({
        component: TestComponent,
        path: ':id',
        title: 'Test',
        breadcrumb: 'Test',
        routeConfig: {
            pathMatch: 'full',
            canActivate: [(route: ActivatedRouteSnapshot) => {
                return inject(PermissionsService).canActivate(route.params.id);
            }],
        },
    }),
];
This allows you to leverage advanced features such as: